Enable your AI assistant to seamlessly schedule meetings and appointments using Cal.com integration. This powerful feature allows your AI to check availability and book meetings directly during calls.Documentation Index
Fetch the complete documentation index at: https://docs.voicery.ai/llms.txt
Use this file to discover all available pages before exploring further.
Prerequisites
Before setting up Cal.com integration, you’ll need:- A Cal.com account (either hosted or self-hosted)
- An event type configured in Cal.com
- An API key from Cal.com
Setup Process
1. Cal.com Configuration
- Sign up or log in to your Cal.com account
-
Create a new event type specifically for AI assistant bookings
- Give it a clear name like “Meeting with AI Assistant”
- Configure duration, availability, and other settings
-
Once created, note down the event ID from the URL

-
Generate an API key:
- Go to Cal.com settings
- Navigate to Developer Settings
- Create a new API key
- Copy and securely store the API key
2. Customer Contact Information
Email Configuration
To send calendar invites to customers:- Define
emailin your assistant’s input variables - Pass the customer’s email as the
emailvariable when creating the lead - The system will automatically use this email for calendar invitations
Phone Number in Calendar Events
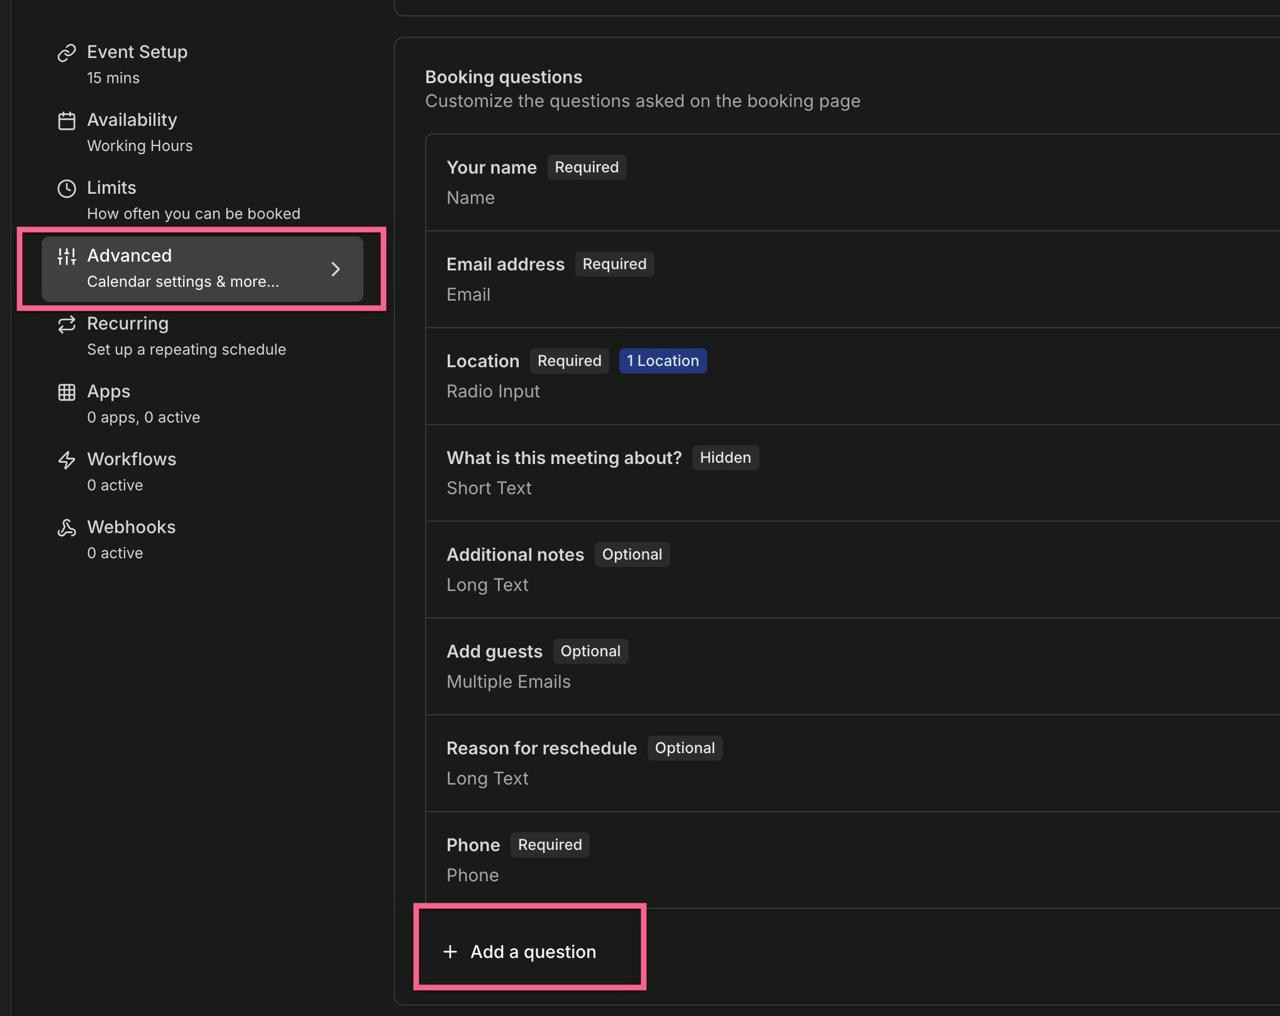
To include the caller’s phone number in calendar events:- Go to your event settings in Cal.com
-
Click on “Add a question”
-
Configure the field with these exact values:
-
Identifier:
phone(this must be exact)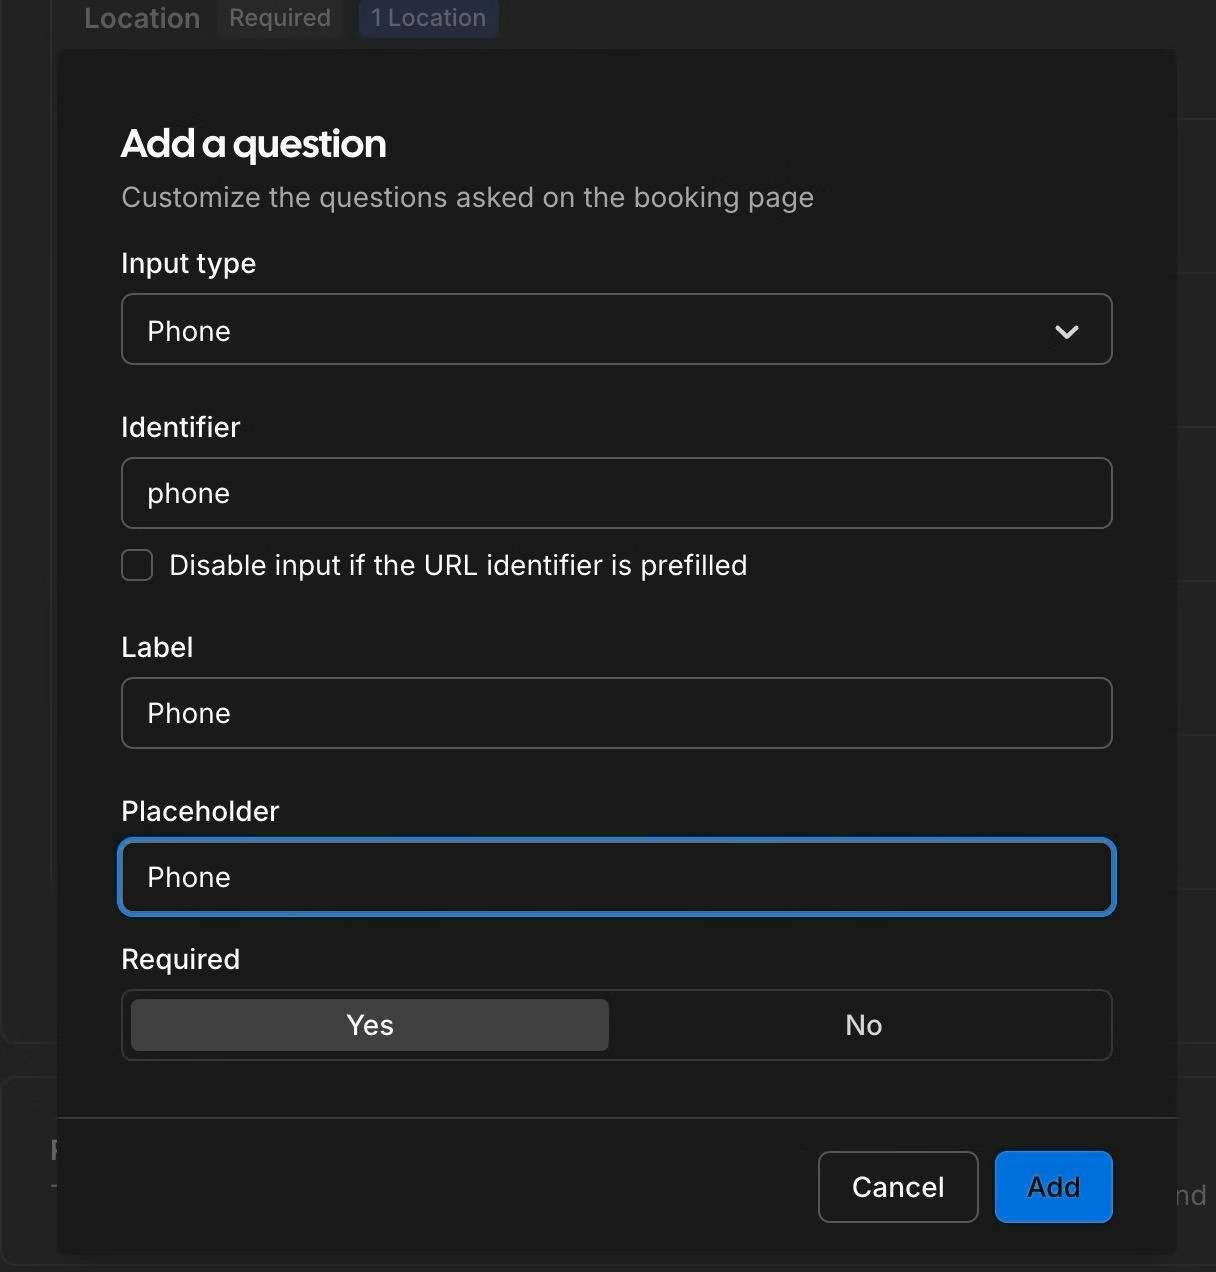
-
Identifier:
-
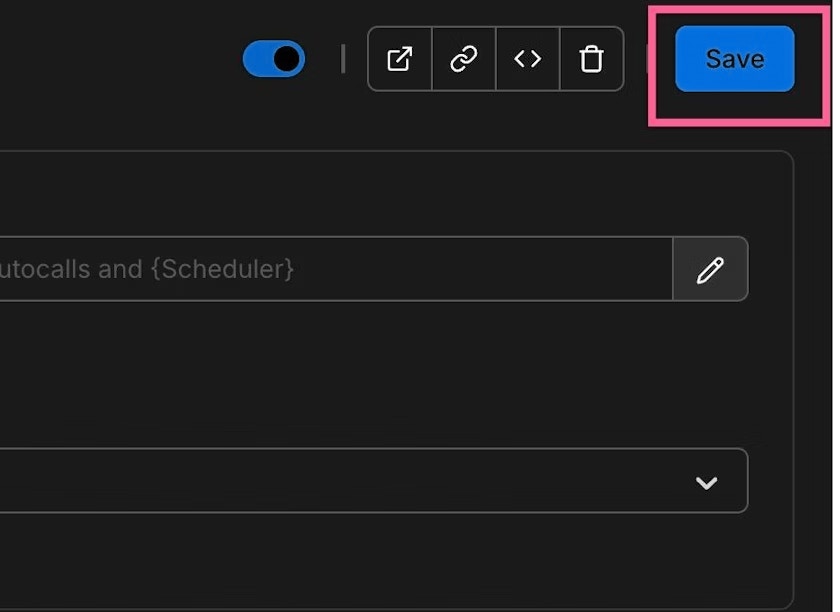
Save your changes
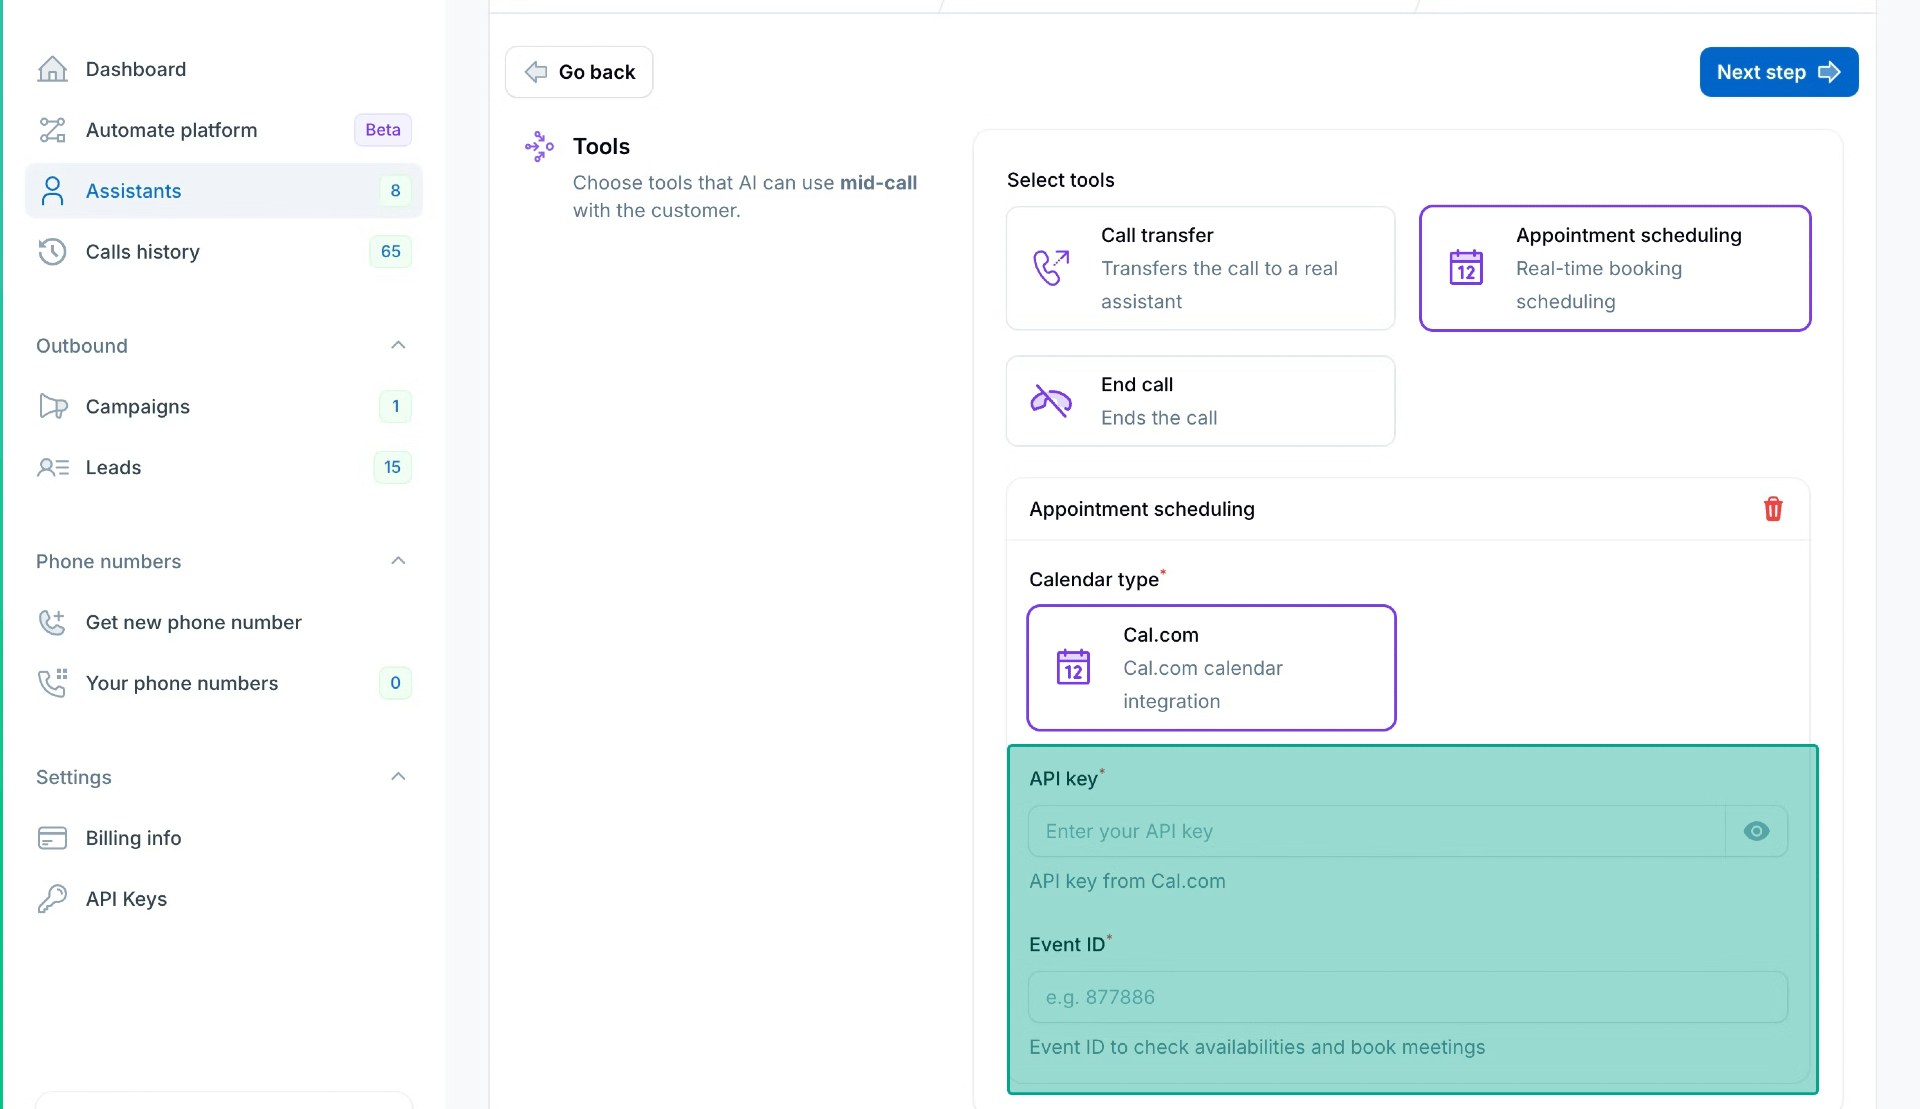
3. Adding Cal.com to Your Assistant
- In your AI assistant settings, locate the Tools section
- Add the Cal.com integration
- Configure the tool with:
- Your Cal.com API key
-
The event type ID
Best Practices
- Create dedicated event types for AI bookings to track their usage
- Set clear buffer times between meetings
- Configure appropriate meeting durations
- Use descriptive event names that make sense to your customers
- Keep only default fields and the phone field optional
- Always include customer email in lead creation for calendar invites
Testing
After setup, we recommend:- Making a test call to your AI assistant
- Requesting to schedule a meeting
- Verifying the booking appears in your Cal.com dashboard
- Checking that the phone number appears in the calendar event
- Verifying the customer receives the calendar invitation email
- Checking the confirmation emails are received
Troubleshooting
Quick Fixes:
Missing API Key Error:- Solution: Enter correct API key and event ID in assistant settings
- Steps: Go to assistant settings → Appointment Scheduling → Enter API key and event ID → Save
- Email Required: Ensure assistant has email defined in assistant settings
- Phone field setup: Add phone field in Cal.com event settings with identifier “phone”. See Phone Number in Calendar Events for detailed setup.
- Test with real phone calls: Use phone call (not web call) for testing
- No custom fields: Don’t add required custom fields in Cal.com event settings
- Verify API key is active in Cal.com developer settings
- Check event ID from your Cal.com event URL
- Confirm phone field identifier is exactly “phone”
For comprehensive Cal.com troubleshooting, including detailed solutions and additional issues, see Cal.com Issues.